Docker 部署 ELK
更新: 11/15/2024 字数: 0 字 时长: 0 分钟
什么是ELK?
ELK是一个日志收集、切割、过滤、储存、展示的大型服务。它包含以下服务:
- ElasticSearch:分布式搜索引擎,这里充当日志储存的服务。
- Kibana:简单来说就是将es中的数据可视化。
- Logstash:日志收集服务,他可以收集多个来源的日志,比如文件、mq、redis等等
在ELK中三个服务版本更迭到8之后,ELK更名为ELK Stack(Elastic Stack)。https://www.elastic.co/cn/what-is/elk-stack
因为Logstash功能很多,占用系统资源过高,而有时我们只需要读取日志文件即可,所以将之前版本的Logstash中的file beats插件单独提取出来,也就是Beats。这样可以减少Logstash的部署实例,减轻服务压力。同时beats既可以输出到Logstash进一步处理,也可以直接输出到ES中储存。

部署
注意:
- ELK三个服务需要使用相同版本,如果版本有差异会出现不可预估的错误
- 部署服务器配置有限制,我这里使用的 4 core+4 g 的配置,并且这里将es中JVM限制,如果配置不够请勿部署,防止服务器宕机丢失数据。
拉取三者镜像,这里我们使用7.16.3版本
shell
docker pull elasticsearch:7.16.3
docker pull kibana:7.16.3
docker pull elasticsearch:7.16.31. 搭建网桥
这里我们创建名为ELK网桥,方便之后ELK中服务解析ip
shell
docker network create --driver=bridge ELK2. ElasticSearch
shell
docker run -d --name es \
 -p 9200:9200 \
 -p 9300:9300 \
 -e ES_JAVA_OPTS="-Xms256m -Xmx256m" \
 -e "discovery.type=single-node" \
 --network ELK -h "es" \
elasticsearch:7.16.3- -p:端口映射:9200为es访问端口,9300为集群部署交互端口
- ES_JAVA_OPTS:es中jvm配置,这里限制为“-Xms256m -Xmx256m”,防止es占用过多崩溃
- discovery.type=single-node:单点部署
- --network ELK -h "es":加入网桥ELK,ip映射为“es”
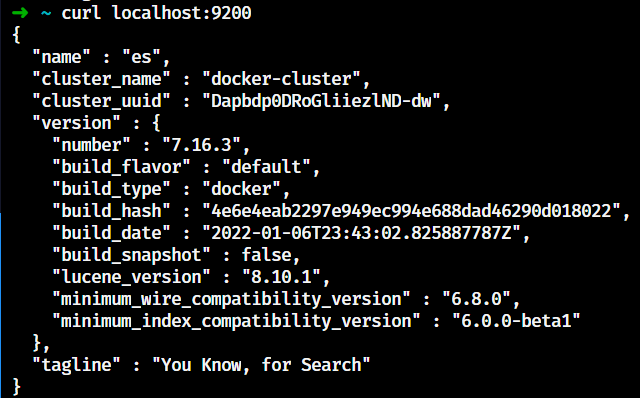
部署完可以访问9200端口,如果出现以下内容即为部署成功
2. Kibana
注意:需要在es部署之后部署,如果先部署可能出现未知错误
shell
docker run  -d \
  -e ELASTICSEARCH_HOSTS=http://es:9200 \
  -p 5601:5601  \
  -e I18N_LOCALE=zh-CN \
  --name kibana \
  --network ELK -h "kibana" \
kibana:7.16.3- ELASTICSEARCH_HOSTS:es地址
- -p:5601位kibana默认访问端口
- I18N_LOCALE:设置kibana为中文
- --network ELK -h "kibana": 加入网桥ELK,ip映射为“kibana”
访问5601端口:

3. Logstash
这里需要将相关日志文件映射到宿主机上,再将文件映射到Logstash内
如果有错误请查看日志!!!!
logstash.yml:logstash配置文件pipelines.yml:Logstash管道配置文件/usr/share/logstash/pipeline/:这里映射了管道的具体配置文件,与pipelines.yml中设置有关,以nginx.conf为例- input:数据来源,这里选择文件
- filter:过滤器,用于处理日志,这里使用json filter处理
- output:输出,这里选择es
yaml
#节点名称,在集群中具备唯一性,默认为logstash主机的主机名
node.name: logstast

#输入、输出及过滤器的总工作数量,也就是logstash的工作进程,此工作进程默认为主机的cpu核心数量
pipeline.workers: 1

#在输入阶段,单个工作线程将从输入中收集的最大事件数,此事件数堆内存开销较大,内存开销可在jvm.options中设置堆内存大小来优化此选项
pipeline.batch.size: 30

#在将一个较小的批发送到filters+output之前,轮询下一个事件时等待的时间(以毫秒为单位)
pipeline.batch.delay: 50

#设置为true时,在强制关闭logstash期间,即使内存中还有事件,那么为true将会强制关闭,导致数据丢失;默认为false,false在强制关闭logstash期间,将拒绝退出,直到所有在管道中的事件被安全输出,再关闭。
pipeline.unsafe_shutdown: false

#logstash间隔多久检查一次配置中的更改,默认为3秒
config.reload.interval: 15syaml
#唯一id(标识用的)
- pipeline.id: http.conf
  #开启线程数量
  pipeline.workers: 1
  #指定对应conf文件
  path.config: "/usr/share/logstash/pipeline/http.conf"

- pipeline.id: rpc.conf
  #开启线程数量
  pipeline.workers: 1
  #指定对应conf文件
  path.config: "/usr/share/logstash/pipeline/rpc.conf"

- pipeline.id: nginx.conf
  #开启线程数量
  pipeline.workers: 1
  #指定对应conf文件
  path.config: "/usr/share/logstash/pipeline/nginx.conf"

- pipeline.id: vue.conf
  #开启线程数量
  pipeline.workers: 1
  #指定对应conf文件
path.config: "/usr/share/logstash/pipeline/vue.conf"text
input{
    file{
        path => "/var/logs/nginx/logs/access.log"
        start_position => "beginning"
    }
}
filter {
    json{
        source => "message"
        target => "doc"
    }
    date {
      match => ["timestamp", "ISO8601"]
    }

}
output {
    elasticsearch {
        hosts => ["es:9200"]
        index => "nginx-access-log"
    }
}shell
docker run -d -u root \
  -v /www/wwwroot/logstash/logstash.yml:/usr/share/logstash/config/logstash.yml \
  -v /www/wwwroot/logstash/pipelines.yml:/usr/share/logstash/config/pipelines.yml \
  -v /www/wwwroot/logstash/pipe/:/usr/share/logstash/pipeline/ \
  -v /www/wwwroot/:/var/logs/ \
  --name logstash \
  --network=ELK \
logstash:7.16.3查看日志
Kibana添加解析
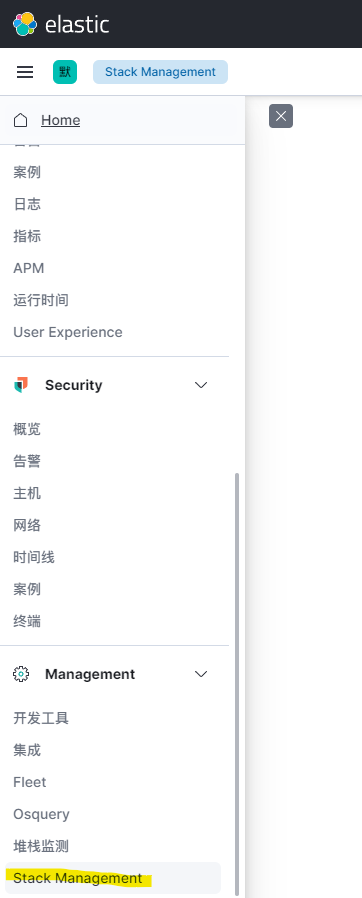
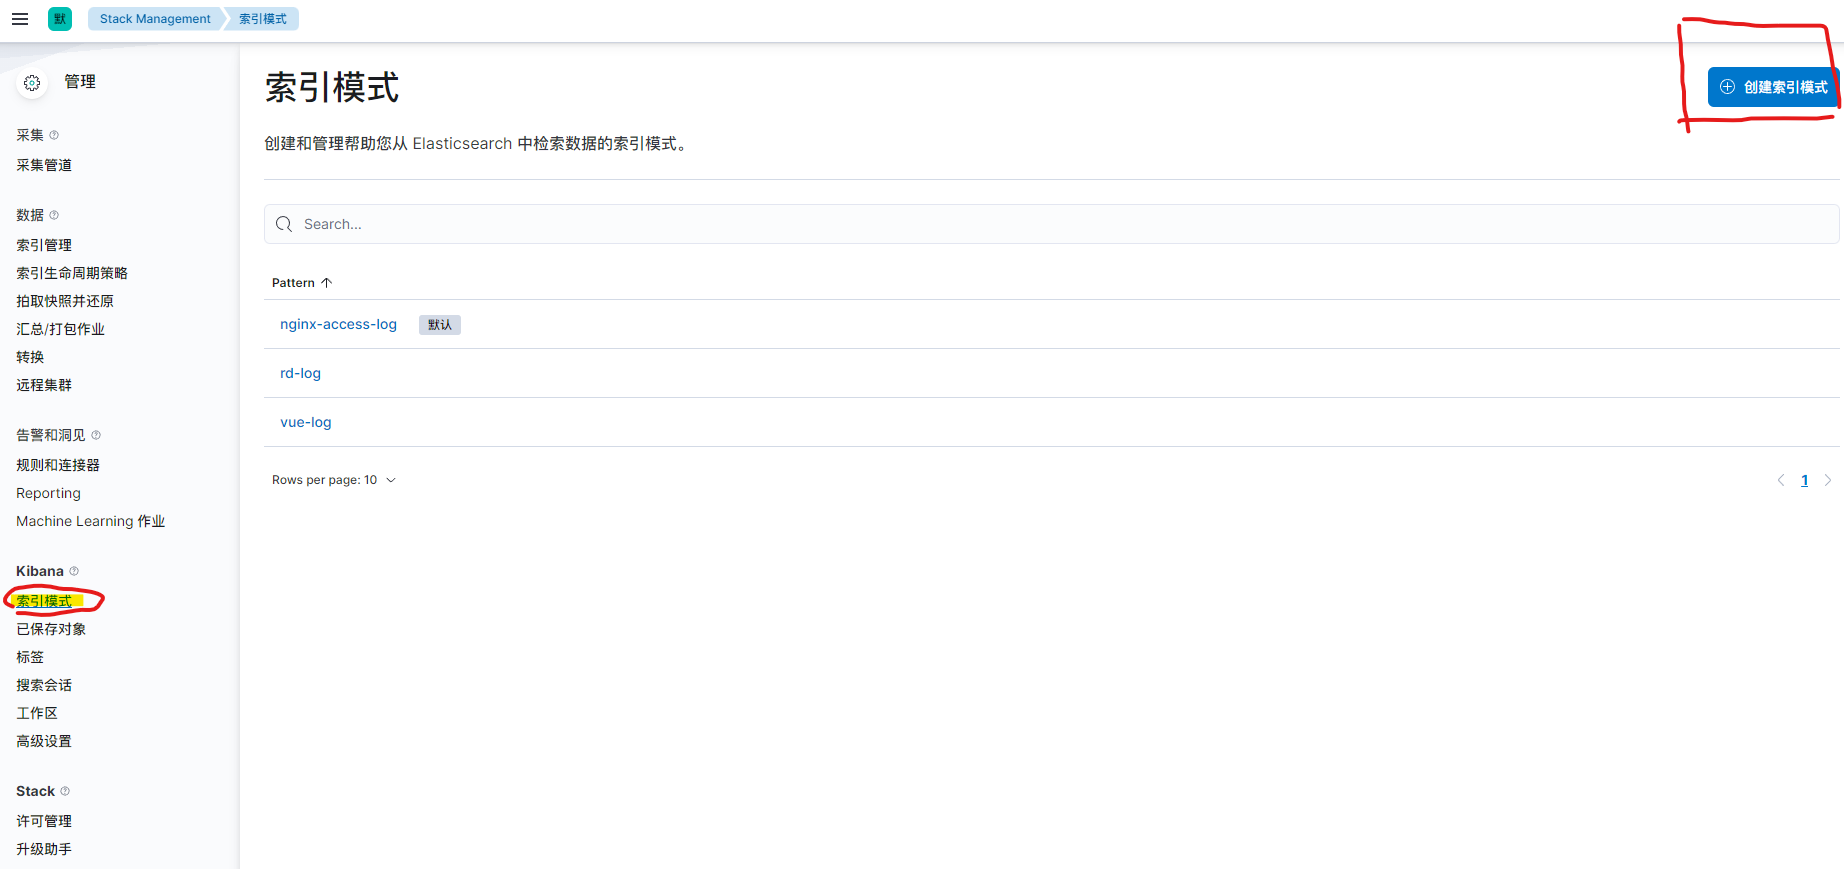
在kibana设置中选择 Stack Management
左侧选择“索引模式”,右侧选择创建索引模式
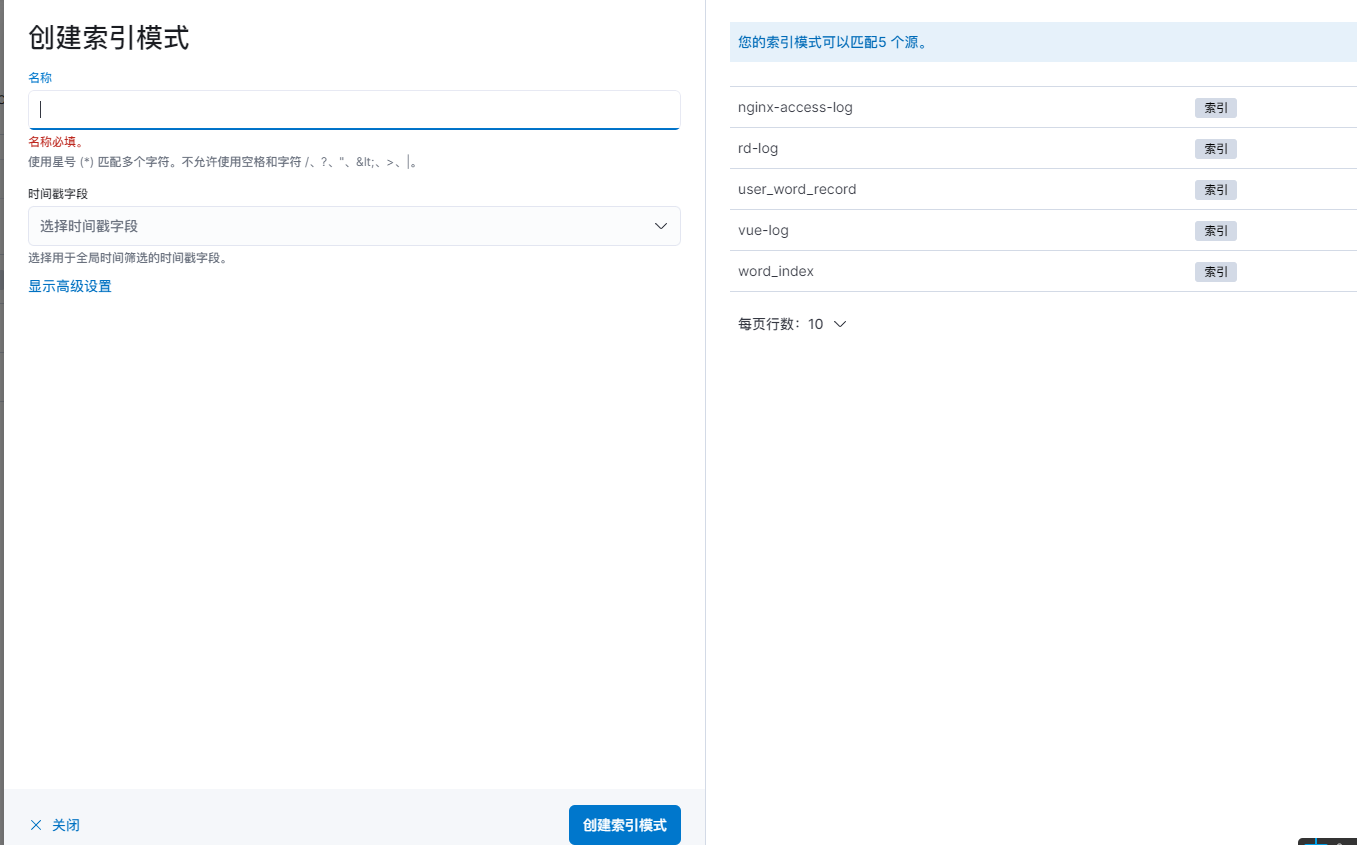
选择对应索引,然后创建
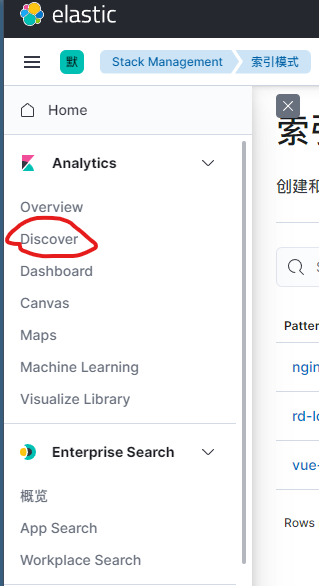
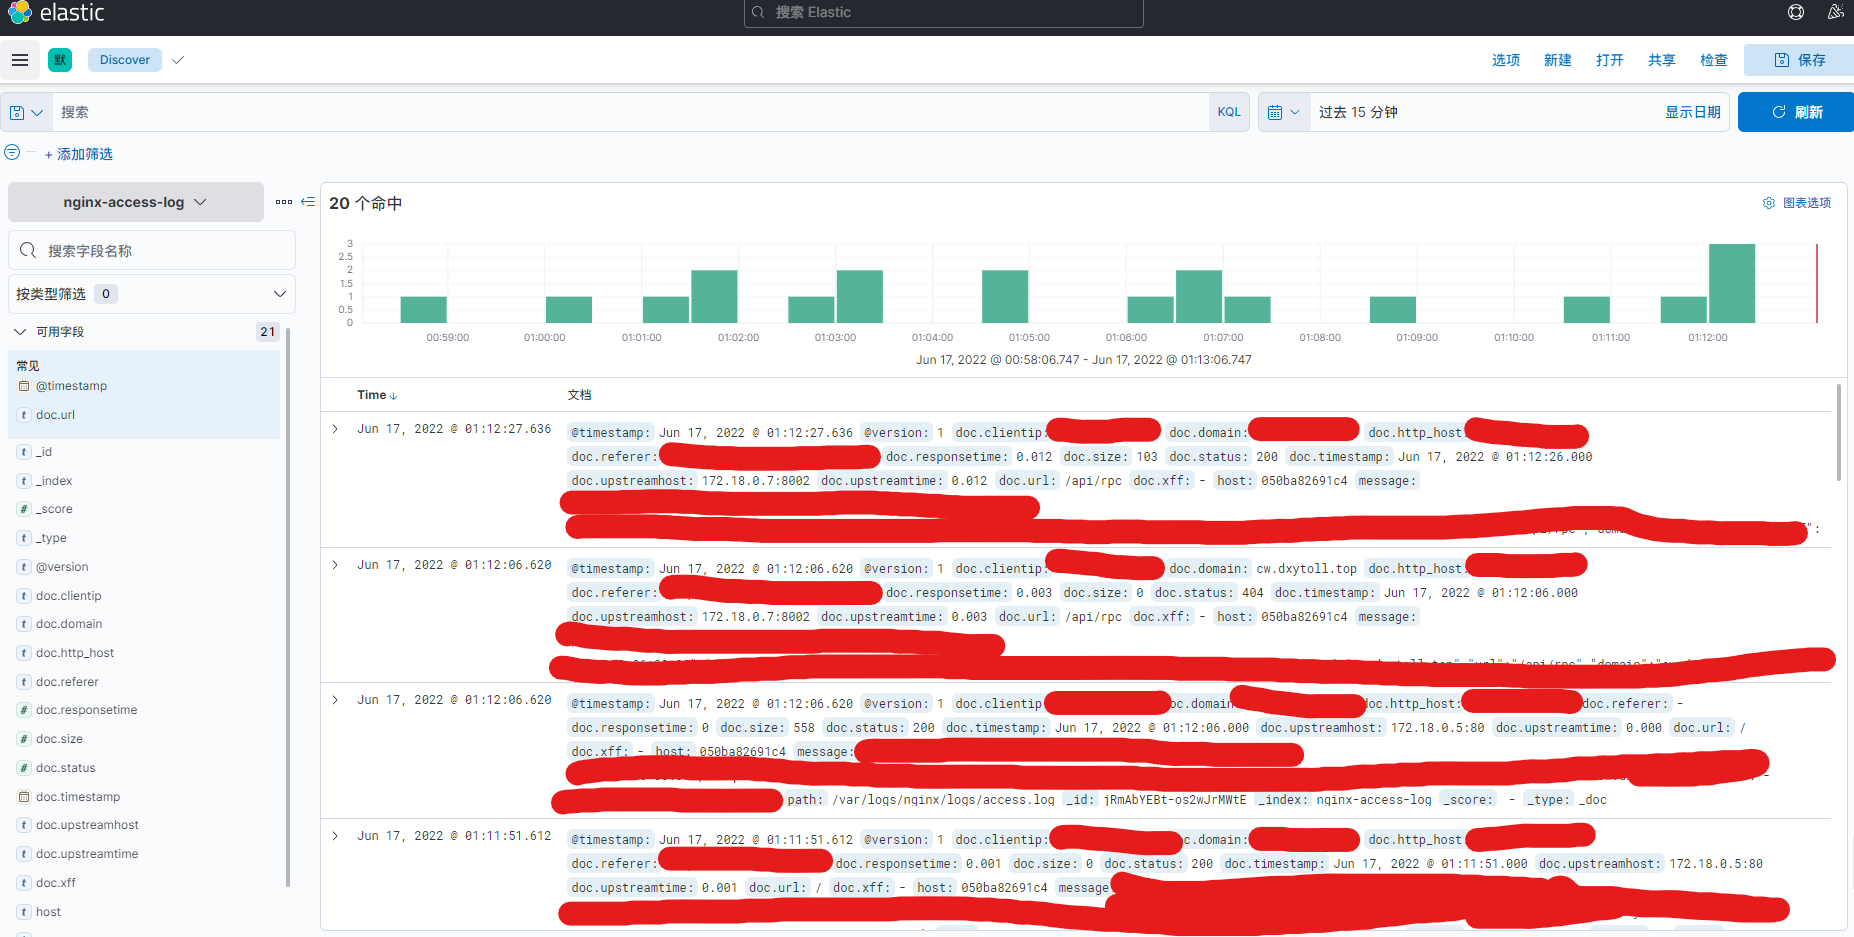
点击左侧Discover
